Power Source Equipment

Call Us Today

855-636-3381

Shop our family of stores:

Leave a Comment

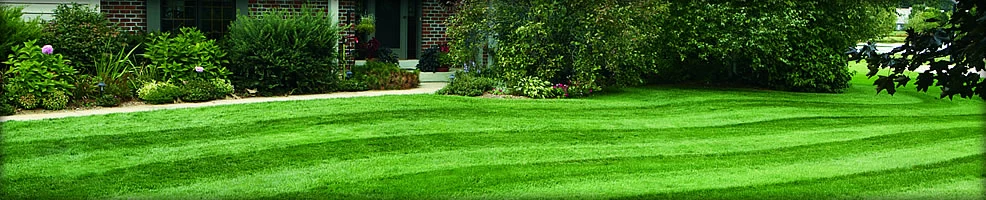
The last thing you want to see happen to your beautifully manicured lawn, the one you put so much time, work and effort into, is to see it destroyed by little multi-legged critters. It’s never any fun waking up to your pristine grass being chewed apart by ravaging little mouths, but luckily, there are a variety of steps you can take to prevent/manage it. The telltale sign of a patchy lawn that’s dead in spots doesn’t have to be something that happens to you, so read on to learn about what you can do for lawn pests.

Recognizing What’s Eating at You – and Your Lawn

One of the most dastardly lawn pests is the chinch bug, a tiny, black-shelled hexapod that’s about a fifth of an inch long. They may be pretty hard to spot, but the scorched earth damage they leave behind is not. The nymphs (babies) are easier to see because they’re pinkish to bright red in color, but unfortunately, they’re usually born in June so you’re a bit out of luck. Either way, you’ll be looking at a lawn that looks like it’s suffered through a drought, with wilting grass blades that turn yellow and die.
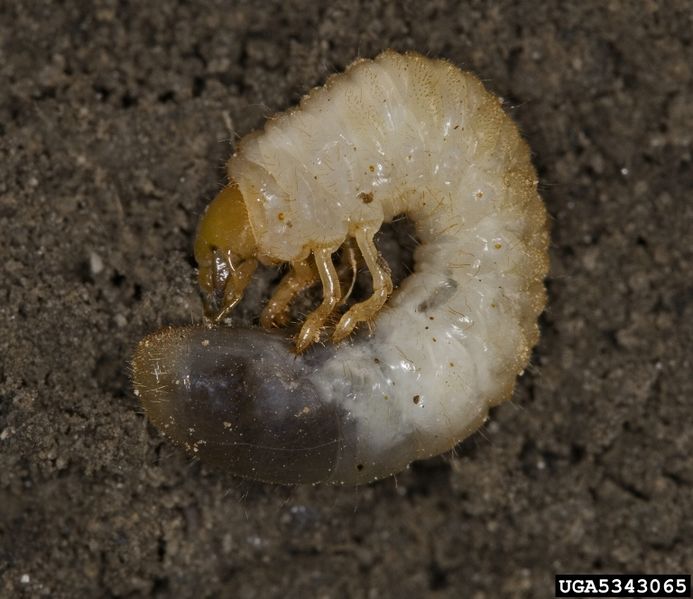
Lawn grub

Lawn grub

Lawn grubs are another nasty culprit, and they aren’t nearly as stealthy as cinch bugs. Fat and white in color, they have a C-shaped body and move pretty slowly. While the damage they cause borders on ruined-lawn devastation, you’ve got one big factor on your side: they can remain underground for up to four years, so the timing of your actions is a lot more flexible.

Finally, we come to the Japanese beetle, which is a 0.6″ lout with a copper-colored back and green thorax/head. It’s a bit of a pitiful flyer and its version of Kryptonite is milky spore disease, which can be found in grass roots. Once the USDA realized the Japanese beetle was susceptible to milky spore disease, it began harvesting it to sell as an anti-beetle powder.
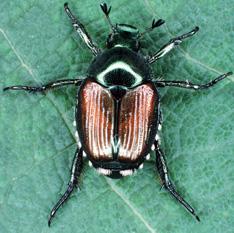
Japanese beetle

Japanese beetle

Sending That Problem Back to Where it Came From

The key to ridding lawn pests from your grass is to formulate a good plan and then act quickly. It’s sort of like tackling rust on your car: if you wait until rust has overtaken your entire vehicle — as opposed to yearly rust-proofing — then it’s too late. You’ll have a much bigger problem to deal with.

One technique, which we discussed a little bit earlier, is to apply milky spore disease to your lawn. The key is to apply it before the Japanese beetles start feeding, when they’re still in the larval stage and look like chubby little white grub worms.

Beneficial Nematodes are another strategy you can use when tackling lawn pests. They’re teeny tiny non-segmented worms that feast on just about everything bad crawling around in your lawn, and a good rule of thumb to use is one vial of Beneficial Nematodes for every 900 square feet of grass. All you have is mix the vial contents with water, and then irrigate your lawn with it either in the early morning or late afternoon.
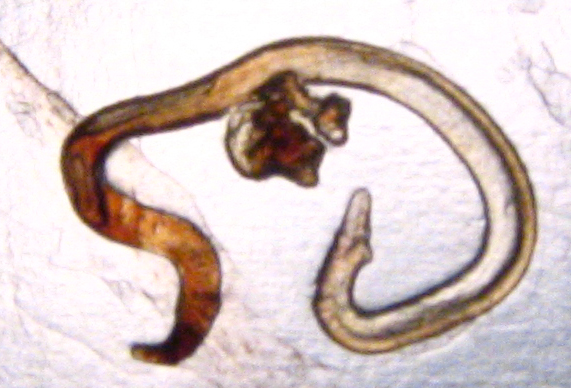
Nematode

Nematode

For a generalized approach, mist this solution on your lawn. It’s a natural insecticide, so it’s a little easier on your grass while still working to get rid of lawn pests.

  • 1 cup of water
  • 1 teaspoon of liquid dish soap
  • 1 teaspoon of vegetable oil
  • Just make sure to wait two to three hours to let it set in, and then rinse off so the soapiness doesn’t wreck the grass. Apply it again every day for about three days.

    Stopping lawn pests from taking over isn’t an easy task, as you’ll need to battle it constantly to get that lush green look back. But if you keep at it and tackle the problems as they come, you can show those lawn pests who’s the boss at the end of the day. For everything you else you need to make sure your lawn keeps looking awesome, check out our inventory and enjoy free shipping on everything you order.
    Leave a Comment

    Most of us have seen Edward Scissorhands and remember the scene when he whips Peggy’s yard into a work of art, making it go from an overgrown mess into the jewel of the neighborhood crown. While showing how to do Edward’s job is a lot more involved than one blog post — it takes artists years of practice to develop that kind of skill — it is possible to learn a few tips and pointers about what makes neat and tidy shrubs. It’s not an overly difficult task and certainly not one you’d need to hire someone to do, just as long as you’re methodical, don’t skip a step, and be patient with yourself. Plus, having the right Mower Source tools will go a long way in ensuring the job is as smooth as possible.
    .

    .

    Starting Small: Pruning

    If you’ve maintained your shrubbery year round in a nice shape, then your task here is small. Branches, unfortunately, don’t grow uniformly and evenly and will need a bit of shaping, sort of like regular haircuts for yourself. The key is to be a little conservative because you’re this late in the season, and just prune the stuff that’s sticking out waywardly. The kinds of branches you’ll want to tackle will be thin and weak- or dead-looking, making a 45-degree angle cut just above a node of new growth.

    Jumping In: Making Something Out of a Mess

    At the opposite end of the spectrum from above is shrubbery that hasn’t been touched at all, a sort of before picture until Edward Scissorhands got his paws on it. You’ll first want to trim off any tangled or really long branches from the top, front and sides; if your shrubs are up against a wall, lop off any of the really long branches that stick out awkwardly.

    .

    .

    Next you’ll be giving it a generally tidy shape, which can be easy or difficult, depending on whether or not you have an eye for straight lines. Many people don’t, and it’s easier to take a couple of pre-steps to ensure your shrubs don’t slope. Just put up a stake at either end of your shrubs, tie a string across, and use a carpenter’s level to make sure it’s straight. For bigger shrubs, have two stakes at either end: one for the front of the shrub and one for the back.

    You can use the same stakes for both the tops and fronts of your shrubs, simply adjusting where the strings are. For a straight line on the top, keep the strings on the top. For a straight line on the front, move the strings to the front.

    Going Artistic: Fine-tuning What’s Already Been Shaped

    If you’re intent on making your bushes and shrubs into shapes, like cats or lollipops, then you need to start when the plants are still relatively young, such as before they’re two feet high. After that, you’ll be wrestling with a lot of growth, which will make your job more suited to professionals.

    The two basic shapes you’ll be starting with are either an oval or a square, both of which can be shaped into more complex looks as they grow. Next, get a hold of some chicken wire to bend into basic shapes, using zip ties to hold the wires together into a frame (the frame will go over your bushes), and only trim a few inches at a time (about once a month). Remember, complex shapes like animals will takes years to become fully formed, so go at it patiently and with a long-term view in mind.

    Mower Source is your go-to place when it comes to both high-quality tools and all things related to your yard. Having the right hedge trimmers will make your job infinitely easier, so check out our selection now and enjoy free shipping on every item.