Power Source Equipment

Call Us Today

855-636-3381

Shop our family of stores:

Leave a Comment

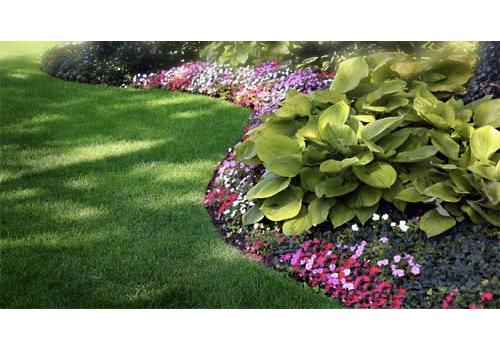
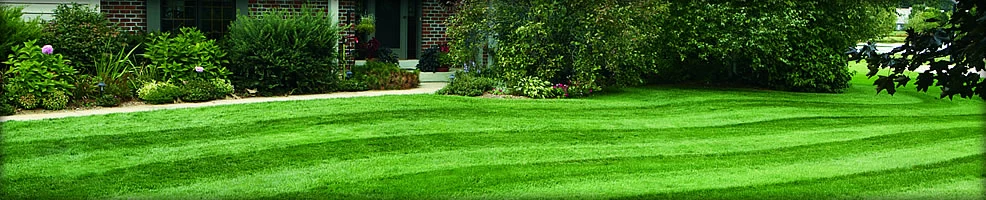
Most of us have seen Edward Scissorhands and remember the scene when he whips Peggy’s yard into a work of art, making it go from an overgrown mess into the jewel of the neighborhood crown. While showing how to do Edward’s job is a lot more involved than one blog post — it takes artists years of practice to develop that kind of skill — it is possible to learn a few tips and pointers about what makes neat and tidy shrubs. It’s not an overly difficult task and certainly not one you’d need to hire someone to do, just as long as you’re methodical, don’t skip a step, and be patient with yourself. Plus, having the right Mower Source tools will go a long way in ensuring the job is as smooth as possible.
.

.

Starting Small: Pruning

If you’ve maintained your shrubbery year round in a nice shape, then your task here is small. Branches, unfortunately, don’t grow uniformly and evenly and will need a bit of shaping, sort of like regular haircuts for yourself. The key is to be a little conservative because you’re this late in the season, and just prune the stuff that’s sticking out waywardly. The kinds of branches you’ll want to tackle will be thin and weak- or dead-looking, making a 45-degree angle cut just above a node of new growth.

Jumping In: Making Something Out of a Mess

At the opposite end of the spectrum from above is shrubbery that hasn’t been touched at all, a sort of before picture until Edward Scissorhands got his paws on it. You’ll first want to trim off any tangled or really long branches from the top, front and sides; if your shrubs are up against a wall, lop off any of the really long branches that stick out awkwardly.

.

.

Next you’ll be giving it a generally tidy shape, which can be easy or difficult, depending on whether or not you have an eye for straight lines. Many people don’t, and it’s easier to take a couple of pre-steps to ensure your shrubs don’t slope. Just put up a stake at either end of your shrubs, tie a string across, and use a carpenter’s level to make sure it’s straight. For bigger shrubs, have two stakes at either end: one for the front of the shrub and one for the back.

You can use the same stakes for both the tops and fronts of your shrubs, simply adjusting where the strings are. For a straight line on the top, keep the strings on the top. For a straight line on the front, move the strings to the front.

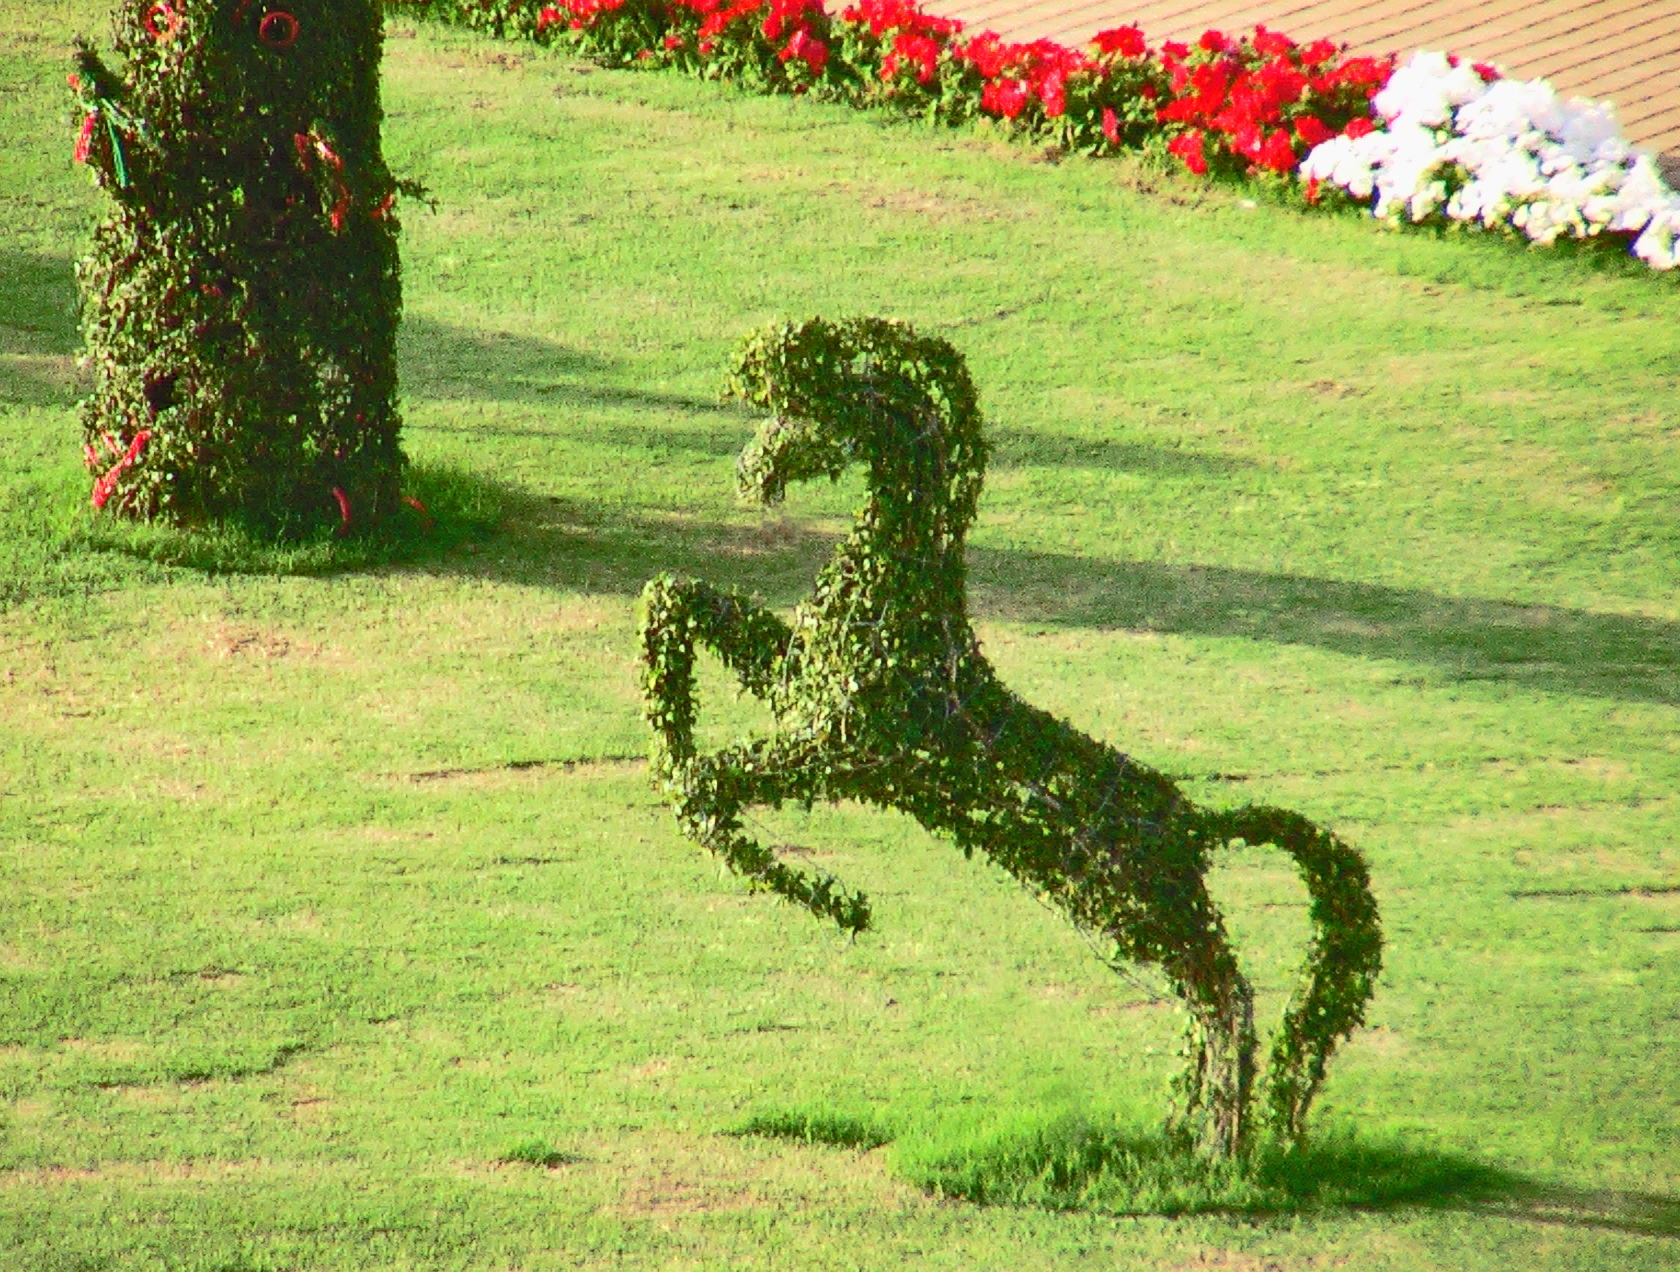
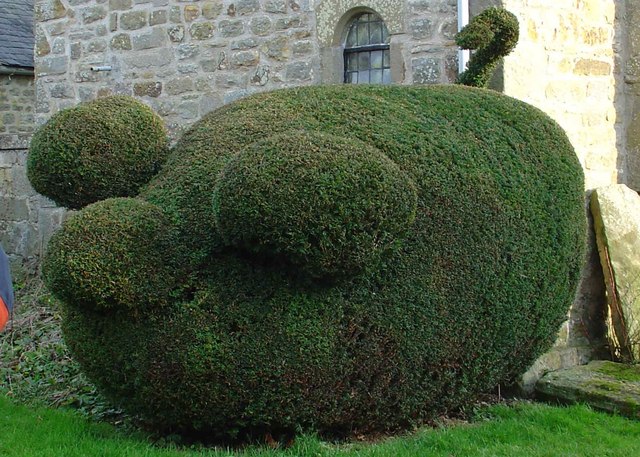
Going Artistic: Fine-tuning What’s Already Been Shaped

If you’re intent on making your bushes and shrubs into shapes, like cats or lollipops, then you need to start when the plants are still relatively young, such as before they’re two feet high. After that, you’ll be wrestling with a lot of growth, which will make your job more suited to professionals.

The two basic shapes you’ll be starting with are either an oval or a square, both of which can be shaped into more complex looks as they grow. Next, get a hold of some chicken wire to bend into basic shapes, using zip ties to hold the wires together into a frame (the frame will go over your bushes), and only trim a few inches at a time (about once a month). Remember, complex shapes like animals will takes years to become fully formed, so go at it patiently and with a long-term view in mind.

Mower Source is your go-to place when it comes to both high-quality tools and all things related to your yard. Having the right hedge trimmers will make your job infinitely easier, so check out our selection now and enjoy free shipping on every item.
Posted on by
Leave a Comment

We hate to say the following words — but summer will soon be over and autumn is waiting just around the corner. Because of that, your lawn and garden need to be prepared for the upcoming cooler weather so you’ll have a lush, green yard next year. It doesn’t take too much work, as maintenance is far easier than letting things go and facing a mountain of work. In this Mower Source post, we’ll go over some of the things you’ll have to start looking at in the coming weeks to prepare your garden for the fall.
.

.

Get Rid of the Weeds

By far, one of the most important things you can do for your lawn and garden is keeping it free of weeds. You can use pesticides, but there’s no guarantee you’ll hit every single pest. Plus, dousing your lawn and garden in pesticides doesn’t exactly provide a hospitable environment for grass and plants to grow and thrive.

As much as everyone hates pulling weeds, it’s really the best way to go. The thought of bending down and yanking weed after weed is something that few people look forward to, but that’s because they don’t do it right. Instead, follow these tips to make the job much easier:

  • Put on some good music to distract you from the task.
  • Pick a humid or damp day so the soil will be loose, making it easier to pull out the weeds. If that’s not possible, pour hot water over the weeds to loosen them up.
  • If the weeds aren’t buried in snugly, pull them from the base, making sure to get the root (or else they’ll regrow themselves).
  • If the weeds are buried snugly, use a small shovel or garden cultivator to loosen the soil, even pulling up clumps of soil just to ensure you’ve got the weed by the root.
  • Treat the Soil

    If you live in a northern state, like Wisconsin or Minnesota, you’re not used to year-long sunshine that’s strong and powerful. And if you go on vacation somewhere where the weather is like that, like Hawaii, then your skin will throw a little hissy fit. You know this, and prepare your skin by slathering on sunscreen.

    Do the same for your soil, giving it a protective coating for the impending cooler air. Soil particularly likes compost and cover crops, with a thin layer of topsoil raked over a little bonus. For your grass, wait until the leaves start falling and then use your lawn mower to turn it into mulch. These measures are a little bit of rejuvenation for your lawn and garden, and help prime it until the sun pokes out again next spring.

    .

    .

    Plant Cool Season Grasses

    This tip applies to states where cooler weather is a regularity, not an exception. Putting in cool-season grasses — those that do the majority of their growing when the weather is cooler (not necessarily cold) rather than warmer. Some of the grasses you’ll be looking at include fescue and rye, and by planting before the frost hits, you’ll be giving the seeds a chance to spread and take root.

    You’ll also want to apply a slow-release fertilizer, giving your grasses an extra bit of carbohydrates so they can stay “fed” during the cold months. It’s not a necessary step to take, but it will give your lawn a boost in looking healthy come spring.

    And if you want to plant ornamental grasses for a gorgeous autumn look, try out fountain grass, red switch grass, feather reed grass or flame grass for amazing color and texture.

    Mower Source has you covered on everything that has to do with your yard, from how to mow your grass properly to what a great garden should — and can — look like. And on every product you buy from us, we’ll send it over right away without charging a dime for taxes (except MN) and shipping.
    Posted on by
    Leave a Comment

    Nobody thinks they’ll ever get injured when mowing the lawn and not because they don’t misunderstand the injuries a lawn mower can cause, but because they think the accidents will always happen to someone else. But that’s not the case, as people get injured by lawn mowers everyday. Sometimes it’s because of lack of preparation, sometimes it’s because of distraction, and sometimes it’s because of truly unavoidable circumstances. Mower Source is here to look over some of the most common accidents that can happen with a lawn mower, and what you can do to minimize your chances of becoming a statistic.
    .

    .

    Contact with the Rotating Blade

    You’re mowing along happily when suddenly, you notice the grass isn’t being cut anymore. So, in an attempt to get it going again, you turn the lawn mower off, reach underneath to clear a clump of clogged grass…and find out the blades haven’t stopped moving. This kind of accident can also occur if you reach into the discharge chute, and is incredibly preventable. Remember that just because you turned the lawn mower off, it doesn’t necessarily mean the blades won’t move of their own accord. Sometimes, there’s pressure holding them in a certain position and dislodging the object that’s pushing them back can cause a reverse reaction, causing the blades to move. Your best bet is to turn the machine off, unplug the cord (if it’s an electrical lawn mower), and then use a stick or broom handle to dislodge anything underneath or in the chute.

    Thrown Objects

    Let’s say you’re smart about not sticking your hand anywhere near the blades and know to use a stick instead — you’re still not out of the accident woods yet. Objects on your lawn that can’t get shredded by the blades — just about anything other than grass, small sticks, and paper — will ricochet off the blades and possibly up at you. And despite your best efforts to clear the lawn free of debris before you start, there can still be little objects laying hidden in the grass, like pieces of glass or small stones. Your best course of action is to walk around your lawn before you start, trying as best as you can to pick up anything that’s not grass.

    .

    .

    Burns

    If you ride a motorcycle, then you know to be incredibly careful of the muffler when you dismount, because that thing gets incredibly hot, incredibly fast. Lawn mowers operate much the same way, heating up quickly and able to cause severe burns. Treat your lawn mower like an oven, and don’t touch until you’re absolutely sure it’s cooled down. Another kind of burn injury can be caused if gasoline leaks anywhere, and is sparked into a fire by the engine’s ignition system or battery. To prevent becoming seriously injured, make sure you have a fire extinguisher outside with you that can put out either electrical or gasoline fires.

    Back-Over Accidents

    If you use a riding lawn mower, then this type of accident is always a possibility. You don’t have a lot of visibility behind you, and with the amount of noise a riding mower makes, there’s always the chance of reversing over someone. To avoid this, always have your children or anyone else in plain sight before going backwards.

    And as sturdy as some riding mowers may be, they’re not completely immune from toppling over, such as on hills or bumpy spots on the lawn. To prevent this, go as steadily as you can, using a walk-behind mower if you have to on tricky bits. It may seem like a lot of extra work, but compared to the chance of severe injury caused by riding a lawn mower over trouble spots, it’s just a lot smarter to take a couple minutes extra.

    Mower Source knows that its readers are a smart, safe bunch, which is why we want you to check our selection of lawn mowers and accessories so you can practice these safety tips on top-of-the-line products. Order anything you want, and get free shipping to the lower 48 states.
    Posted on by
    Leave a Comment

    It’s not enough to just pull out your Mower Source lawn mower, throw it back and forth a couple of times, and call it a day. To really get an ace-looking lawn, the devil lies in the details: mulching, watering and edging. In this post, we’ll take a look at the last point and what’s involved in getting your lawn looking as though it was professionally designed. Because at the heart of every beautiful lawn isn’t someone whose sole occupation is landscaping, but a person who’s able to recognize the difference between a job mostly done and a job really taken to the nth degree. Edging, in particular, keeps your lawn looking crisp and neat, even when the rest of it may be suffering a bit. The key is to make sure all areas are looked after, but for now, we’ll tackle edging.

    Mow the Lawn First

    To get the most accurate sense of how much you should be edging and what needs to be done, cut your lawn first. This’ll put the grass at a mostly even length throughout, and make your edging job a lot easier. Don’t worry too much about use a weed trimmer to really get the corners done well, as you’ll be focusing on that a little bit later on.

    .

    .

    Mark out the Edges

    There are some people who have a natural eye in being able to size something up right away, and quite accurately measure it for dimensions and perspective (think of hanging pictures on a wall). However, not everyone has this knack, so don’t leave anything to chance and measure it out by hand. When it comes to your lawn, you don’t have many second chances at making sure the lines are as straight, neat and even as they should be.

    One way of marking out the edges is to use chalk to draw a line where you want your new edges to be. Once your line is drawn, take a spade or gardening shovel and make half-moon indentations a few inches deep. Or if you don’t have chalk, just lay out your garden hose in a straight line and make your half-moon indentations that way.

    Separate the Turf from the Edges

    Now that you know exactly where your edges are going to be, it’s time to take the turf out and create your new border. This can be both the easiest and hardest part of the process, as people can use either any tool they want or proper edging tools. If you’re up for a bit of MacGyver-ing, then go ahead and pull out those bits of turf with a spade, your hand, or anything else you’ve got around. But for an easier time — which also means investing in the right tools — then use an edger or pair of sharp shears. Whatever tool you use, just make sure you keep the edges going down at a right angle to make it look as good as possible.

    .

    .

    Tidy Up the Last Few Details

    There are two ways of finishing up your edging job:

  • Flower Bed: Pour some fresh, black topsoil into the new space to create a professional look. It’s a little late in the season to turn over the soil, but using a garden cultivator can help break up compacted soil and aerate it enough that a layer of topsoil can still work its magic.
  • Other Edging: If you’ve created edging in places where you intend to do something completely different, like a circle that’ll feature a certain kind of perennial or a new rock garden, then filling it in with mulch is your best bet. Depending on what kind of color the plants are and how much sun/water that area will get, you’ll have to pick out your mulch based on that.
  • Check out Mower Source for everything you need to give yourself a great-looking lawn, whether it’s our stellar collection of lawn mowers or that edger you need to make your job easier. And with whatever you buy, enjoy free shipping to the lower 48 states.
    Posted on by
    Leave a Comment

    Watering your lawn and mowing it are just two of the steps you need in order to make sure it’s green and healthy. But like the hair on the top of your head, there’s more involved than just shampooing and trimming it. You need to devote a bit of time into bringing your lawn to its full potential, and if you take the steps now, it’ll be a lot easier than later in the season.
    .

    .

    Benefits of Mulching Your Lawn

    Think of how you go about your day: you don’t just wake up, go to work, and then fall asleep again at the end of it, do you? Probably not. Instead, you take a shower so you feel good and smell clean, and eat a few meals so your body has enough energy to keep on ticking.

    Your lawn is the same way in that it needs maintenance and nutrition. Mulching helps put back into the earth what others may consider lawn waste, and can save up to 25% of your fertilizing costs. Still not convinced? Mulching, when done properly, can help cut down on the weeds in your lawn because it cuts off one of most valuable resources they need: sunlight. A good layer of mulch keeps weeds shaded, preventing them from being able to suck the nutrients out of your lawn.

    Mulching also acts as an air-conditioning blanket for your lawn by keeping the soil cool and shaded. You don’t need to be a scientist to know that the more sun exposed soil has, the more it can dry out. And the more it dries out, the less moisture there is for your grass to grow strong and healthy. By creating this barrier with mulch, you don’t have to worry about your lawn getting dried out or going out there constantly to water the grass.

    .

    .

    How to Mulch Effectively

    This isn’t a hard or complicated process at all, and just involves the following steps:

  • 1. Don’t rake the leaves, but keep them on the lawn for your lawn mower to break up and spread around. This also mixes them with grass clippings for added benefit.
  • 2. Use a lawn mower that mulches, side discharges, or comes with a bag that allows you to evenly spread out the clippings on the lawn. We particularly like side discharge lawn mowers because it spits the grass clippings out, letting you run over them again with the lawn mower to break it up into small little clumps that won’t sit heavily on the lawn.
  • 3. Use an alternating stripe pattern when you mow to get at all the clippings. Alternatively, you can mow in concentric circles to achieve the same effect, but this takes a bit more skill in making sure the overall aesthetic is even.
  • 4. Make sure you know what different methods and settings will do: the mulch setting on your lawn mower works well for grass that’s dry or moist but not wet, while a bag is for the opposite and side discharge for grass that’s in the middle.
  • While it’s best to mulch your lawn in the fall, it never hurts to do it any time of year that you mow your lawn. Maintenance isn’t something you can do in one day, but rather have to work at it a little bit so your lawn is always lush, green and healthy.

    You’ve read up on awesome mulching techniques, so now it’s time to make sure you’ve got one of our awesome lawn mowers to do the job. You can take a look at our selection here to find the one that’s best for you, and enjoy two great benefits: no tax on anything (except in Minnesota), and free shipping to the lower 48 states.
    Posted on by
    Leave a Comment

    With the exception of homeowners who live in very rainy or tropical areas, watering the lawn is a must if it’s going to look green and lush. It’s easy to get into the habit of splashing some water around or setting a sprinkle out there and forgetting, and both are quick ways to drown your lawn and kill it. Going about it the right way isn’t exactly high science, but there are a few things you should keep in mind to do the job as efficiently as possible.

    (more…)

    Posted on by
    Leave a Comment

    You’ve no doubt already gone out and mowed the lawn at least once this season, if not a few times. After such a long and brutal winter, the temptation to go out there and start sprucing up your lawn is too great to resist, but nor should you. Being outside and tending to your lawn is awesome on so many levels: the fresh air is invigorating, it’s a nice change from channel surfing, and you get to have a hands-on role in boosting your home’s curb appeal. But in your rush to start up the lawn mower, it’s important to remember these safety tips from Mower Source so you don’t end up a statistic.

    .

    1. Keep Your Lawn Mower in Good Shape

    when you get in your car, you want to make sure there are no gaping holes in the flooboard, brakes that are as soft as pudding, or a steering wheel that locks. It’s unsafe, and can cause catastrophic damage. But because your lawn mower is much smaller, it tends to get ignored for basic maintenance.

    This is especially true for riding lawn mowers, because the last thing you want to deal with is a machine with hot oil and many moving parts going rogue on you. You don’t have to necessarily perform a full mechanical inspection every time you use it, but make it a point to eyeball the mower for physical damage and really listen to it when it’s turned on.

    2. Clear the Lawn Before You Begin

    One of the main characters in the movie Crazy in Alabama, Peejoe, gets hit in the eye with a golf ball that the lawn mower spit up (it’s the sixth paragraph in this link). Unfortunately, this type of thing isn’t an isolated incident and people get hit with spit-up objects from their lawn mowers all the time.

    .

    .

    While a lawn mower’s sharp blades can cut through things, they can also act as a surface upon which objects can bounce off. And if one of those objects is a stone or something else that’s not easily cut, that can shoot right back at you and put you in the hospital. Are potentially thousands of dollars of medical bills worth saving a few minutes to not check the lawn?

    3. Watch the Kids

    While you be on top of lawn mower safety, your kids still have to experience the learning curve for themselves, which doesn’t have to be dangerous. Take time to talk to them about the potential dangers of a lawn mower, how they can treat it with respect, and to what degree they can be involved in mowing.

    Kids are curious creatures and learn about their world by touch, so encourage that in a safe way. Let them be around the lawn mower when you are and don’t turn it on unless they’re a safe distance away. The great thing about children is they’re like little sponges: they’ll soak up everything you tell them, so make sure it’s good and safe information.

    4. Don’t Drink and Mow

    You may be thinking what a couple of cold ones has to do with mowing the lawn, but it’s just a better idea to avoid it. Your reflexes slow down, you’re more liable to take chances you wouldn’t when sober, and alcohol has a tendency to make its imbibers feel invincible.

    Just about 99.9% of people reading this will never think anything can happen to them, that they’ve lawn mowed enough times to be able to do it in their sleep. But it’s precisely that complacency that can cause injuries, as accidents rarely just “happen”. Accidents — true accidents — are things that happen completely out of control, like a boulder dropping on your windshield when you’re on the freeway. What others think of accidents are lapses in focus, concentration and judgement, and drinking before mowing is one of the quickest routes there.

    And besides, doesn’t an ice-cold beer taste much better after the physical part of mowing is over?

    Whether you pull or push (safer) your lawn mower, have one that goes in both directions, or switched to electric to be eco-friendly, there are four basic safety tips you should always be practicing. Just because a lawn mower is small doesn’t mean it can do big-time damage, and it’s so easy to prevent it, too. Keep Mower Source’s handy guide close to you if you ever need a quick refresher, and our website even closer. We’ve got an amazing line of lawn mowers for every type of yard, and there’s free shipping to the lower 48 states on all of them.
    Posted on by
    Leave a Comment

    Your lawn is the pride and joy of your yard, the very thing that gives rise to the saying “the grass is greener on the other side”. However, for that to be true, you have to actually pick out what kind of grass will grow green, lush and healthy because not all grass is created equal. Grasses need specific climates in which to thrive, so we’ll be taking a look at which grass you should be growing.
    .

    .

    Cool Season Grass

    These grasses enjoy their peak growing in cooler weather, when you’ll see them grow the most. However, one thing to keep in mind is the difference between cool and cold: cool season grasses do best in temperatures between 65 to 80F, and cold is, well, colder than that.

  • Kentucky Bluegrass: The name was coined because of the flower heads that appear blue when grass grows to its full heigh of two to three feet. But because most homeowners trim their grass well before it reaches this height, they don’t see the blue flower heads.
  • Perennial Ryegrass: The blades on this grass are smooth and hairless, and you can see long parallel lines running down it vertically. It grows to a full height of about 3ft, and is easy to get a full yield.
  • Tall Fescue: If you have slightly acidic soil (pH between 5.5 to 7), then this toothed-edge grass is for you. One of its key characteristics is the grass folds instead of rolls, and has a scruffy, bedhead look when compared to Kentucky bluegrass.
  • Fine Fescue: There are at least five different types of fine fescues, and are known by their fine leaf appearance. Because of their delicate structure, they’re a type of grass you should plant in low-traffic areas, otherwise they can get damaged (and take a while to recover).
  • .

    .

    Warm Season Grass

    Opposite to cool season grass, this family does best when the mercury reads 75 to 90F. Not much of the United States consistently gets these kinds of temperatures, but the southern portion does.

  • Bermuda Grass: It’s funny; this grass is an invasive species in the Middle East, and yet it’s highly prized here for lawns. The blades are colorful with tints of grey, green and purple, loves the sun, and can grow its root system about 6ft deep to get the water it needs.
  • Centipedegrass: Remember Chia Pets? This grass sort of looks like that, with thick, coarse blades and a light/medium green hue. While it doesn’t do so well in drought conditions, it doesn’t need a lot of mowing, making it a very low-maintenance grass.
  • St.Augustine Grass: When you think of grass that looks like a carpet, this is the one. It grows really thick and close together, which is excellent for crowding out weeds. Disadvantage: it takes plugs, sprigs or sod to grow (and is medium- to high-maintenance), but it does well in both slightly acidic and basic soils.
  • Bahiagrass: It’s a low-growing grass that bunches together into a dense sod, with the flowery tips splitting apart in a V-shape. And when you’ve got salty, dry or sandy conditions, then this one grows happily.
  • Zoysia Grass: This is the type of grass you see on golf courses because of its ability to keep standing no matter how many times it’s trod upon, as well as being able to stop erosion on inclines. As an added bonus, they’re super good at resisting drought, disease and weeds.
  • Now that you know exactly what kind of grass you’re going to get, the next step is maintaining it so it always looks good. Mower Source can help, with our line of top-quality mowers. But don’t just take our word for it, check out our lawn mowers and enjoy two awesome bonuses: free shipping to the lower 48 states, and a free blade with any Toro Super Recycler Lawn Mower.
    Leave a Comment

    Ideally, your Mower Source lawn mower will run fine every time because you’ve been taking great care in properly maintaining it. But lawn mowers are mechanical objects with moving parts, and they’re not immune from running into the occasional problems. Because you’re both a dedicated reader and fan of Mower Source‘s high standard of quality, this post on how to troubleshoot basic problems is just for you.

    Lawn Mower Won’t Start

    There are several reasons for this problem, each listed below:

  • Spark Plug: It could be dirty, loose or not connected at all, so clean it, tighten it or connect it (damaged spark plugs need to be replaced).
  • Air Filter: Could be dirty, so give it a thorough cleaning.
  • Fuel: Is the tank full? Or is fuel not reaching the engine? Try tapping the side of the carburetor, filling the tank, or replacing the fuel filter.
  • .

    .

    Lawn Mower Mows Unevenly

    This is almost always one of two problems:

  • Dull Blades: Use a metallic file to sharpen them, take them in for a professional to do, or replace them if they’re really worn.
  • Unbalanced: Sometimes, grass may have built up on one side and needs emptying.
  • Lawn Mower Guzzles Gas

    Lawn mowers that use gas aren’t supposed to go through fuel like a thirsty V12 Hummer, so the culprit is usually a clogged air filter. Clean it thoroughly, or replace it if it’s more than a year old.

    .

    .

    Lawn Mower Suddenly Dies

    Uh-oh! You’re halfway through the lawn and it just quits on you. Here’s what to do:

  • Air Filter: If it’s clogged, your engine is getting suffocated and the filter either needs to be cleaned or replaced.
  • Spark Plug: Same as not starting at all, it may need to be cleaned, tightened, re-connected or replaced.
  • Grass: There could either be a build-up underneath that needs to be cleaned out, or the blades aren’t set high enough if you’re cutting tall grass.
  • Lawn Mower is Smoking

    It’s easy to freak out when you see smoke coming out of your lawn mower, but this isn’t usually a complicated problem. Just make sure to turn the switch off before troubleshooting.

  • Oil Compartment: There may be too much oil in there and it overflowed, or it could be burning because of the engine’s heat. It either needs to be drained or fill, so check the dipstick.
  • Spark Plug: This little bit is responsible for quite a bit in the lawn mower and in this case, it could be covered in oil. Use carburetor cleaner to clean it off.
  • Carburetor: Common issues are that it’s dirty or clogged, and common ways of solving this problem are to clean it or replace it.
  • Lawn Mower Starter Rope Requires the Strength of Hercules

    You pull and pull on that thing, and you may as well be solving geometric proofs for all the good it’s doing. Never fear, it’s usually one of these things:

  • Flywheel Brake: The bar needs to be pulled all the way down or or it just won’t roar to life.
  • Grass: Clogged-up grass in the undercarriage could be blocking the starting process, so scoop everything out and try again. Tip: It’s best to disengage the spark plug first and then empty the undercarriage on a hard surface.
  • Congratulations, you’re now a mini-pro at keeping your Mower Source mower going all the time! And if you don’t have a Mower Source lawn mower, then check out our selection right now. Any lawn mower you have your heart set on, it’ll come right to your doorstep with free shipping. And if you place an order between Monday to Friday before 1pm CST, we’ll ship it that very day!
    Leave a Comment

    Lawns are essentially plants, which means they need regular maintenance to look their best. An ignored lawn may be okay, but it’s highly unlikely. Instead, focusing on it — and focusing on it the right way — means you’re lawn can be happy, healthy and pretty. In this article, Mower Source takes a look at different ways of mowing your lawn to achieve a variety of looks.

    The Wrigley Field Cut

    What lawn is nicer to look at than a baseball field, and especially the one at Wrigley Field? While the overall ballpark has a lot of positive aesthetics going for it, its lawn is one of the biggest components. It’s comprised of mainly alternating stripes, but there’s also a faint cross hatch pattern on it, too.

    .

    .

    How to get the look: Straight lines are a must (alternate the direction on each stripe), but to get the striped look, you have to bend the grass blades in different directions. To do that, leave your grass on the long-ish side and weigh your lawn mower down with duct-taped barbells (to adequately bend the grass). The only tricky bit is maximizing on how much sun can reflect off the grass blades: the direction that gets the most sun on your lawn should be parallel to the sun. For example, if your lawn gets the west sun, mow stripes in east and west lines.

    Spiral

    Want to make your lawn look like a small crop circle? It’s a lot easier than you think. You do have to make a concerted effort to focus on straight lines (making them curved is a lot harder), but using landmarks in your yard helps a great deal. Tip: use a weed whacker on the outer edges before you begin, so that way you can get cleaner lines.

    How to get the look: Start in the middle of your lawn and move in outward concentric lines. Or, in less fancier terms, mow up one lawn mower width, turn, and repeat until you’ve done the whole lawn. Only turn in one direction.

    .

    .

    Quadruple Spiral

    If you’re looking for a big challenge but something that’ll make your lawn look really cool, give four spirals a go. It can get a bit tricky keeping track of all the turns (62) and straight lines, but outlining it faintly in chalk first can cut out a lot of that.

    How to get the look: Start on one edge and go from the middle spot. From there, you’ll be cutting into the first center of one spiral, mowing your way out of it and into the center of another spiral, and so on until you’ve done all four.

    .

    .

    Zig Zag Spiral

    This is an identical pattern to the Spiral, except there are zig zags mown into every line. The result — if done correctly — is a lawn that looks like a completed jigsaw puzzle, with each puzzle piece the same shape and size.

    How to get this look: Start in a corner (as opposed to the exact center as with the normal spiral), and turn your lawn mower 90 degrees every lawn mower width. Go from corner to corner in reverse concentric lines until you’ve reached the center.

    Labyrinth

    This looks like a tricky pattern to achieve, but that’s more illusion than actuality. If you don’t have a good eye for going at it with your lawn mower, outline the pattern first with chalk and then follow the lines.

    How to get the look: You’ll want to start in one corner, mow down the edge, stop halfway and then begin the labyrinth. It can be a little dizzying to complete, but the finished look is so worth it.

    .

    .

    You’re set with a number of different patterns you can mow your lawn with, so the only thing left is making sure you’ve got the right lawn mower. Check out Mower Source’s selection of lawn mowers to settle on the one that’s right for you, and enjoy free shipping to the lower 48 states.